Build a Nigerian Sized PVC Milk Stand for Show or Home
Note: I found the legs a bit too long for our older gals and cut them down a bit from my original plan below.
Dimensions: Platform 35″x16″, Headgate (from platform) 28″, Height to platform 17″ (Note the picture shows a stand with 20″ height. It was a bit too high for some of the older does, so I changed the leg height to a bit shorter).
Approximate cost: Under 50.00
Time: 2-4 Hours, depending upon experience level.
Material: 20 ft. 1.5″ PVC, 3′ 1″ PVC, 17- PVC 1.5″ T’s, 2-PVC 1.5″ 90degree corners, 6-1.5″ caps, 2-3″ Clevis pins, 2-3″ pins, plywood, PVC “blue” glue, 5/8-1″ deck screws.
Directions:
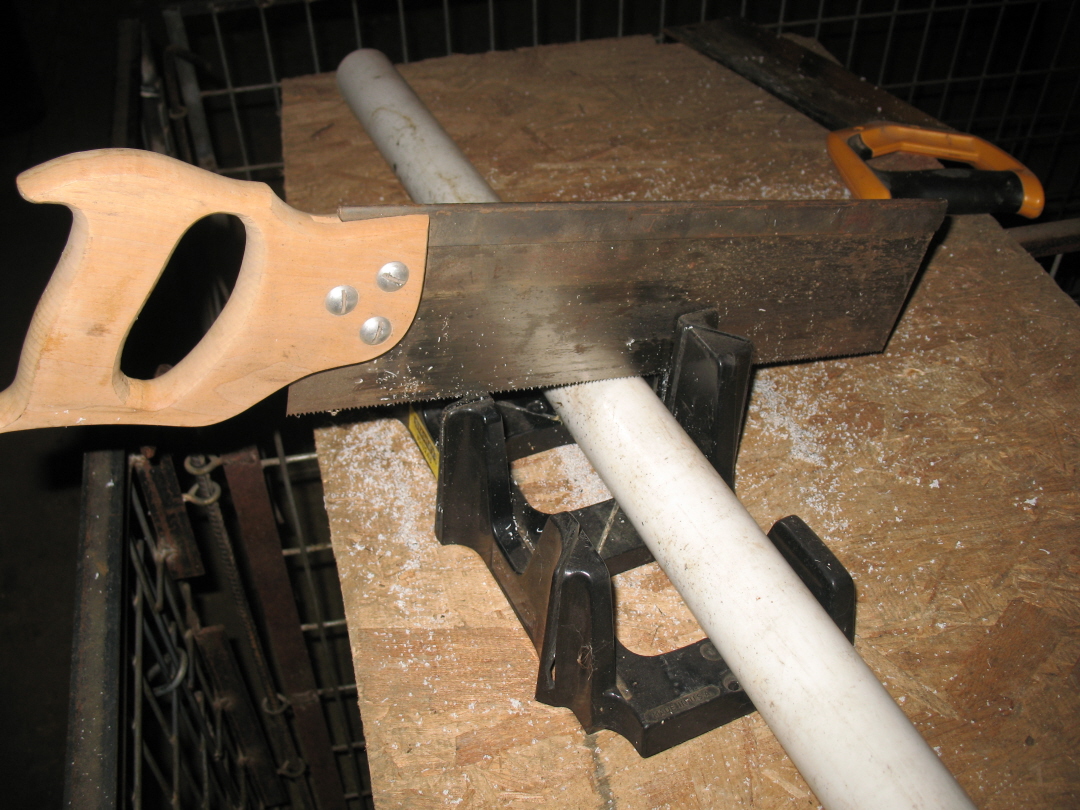
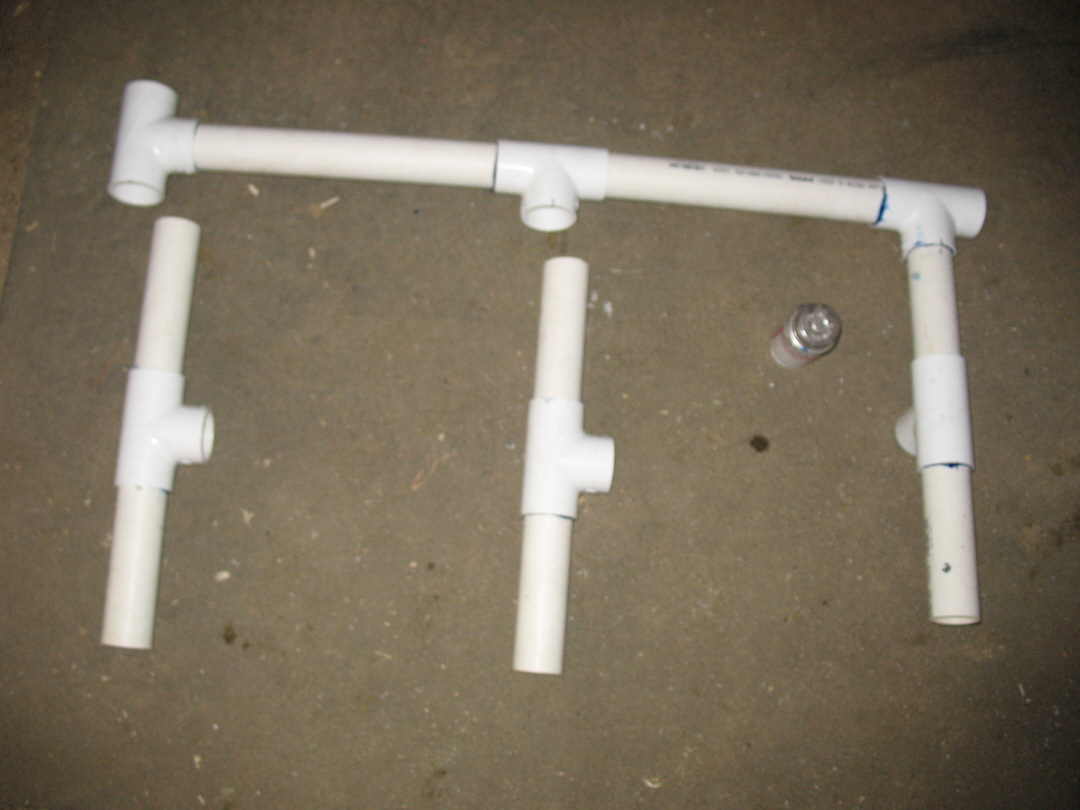
| 1. Base: Cut 4 side pieces at 14″ each |
| 2. Base: Cut 3 cross braces at 13″ each |
| 3. Base: Cut 12 leg pieces at 4″ each |
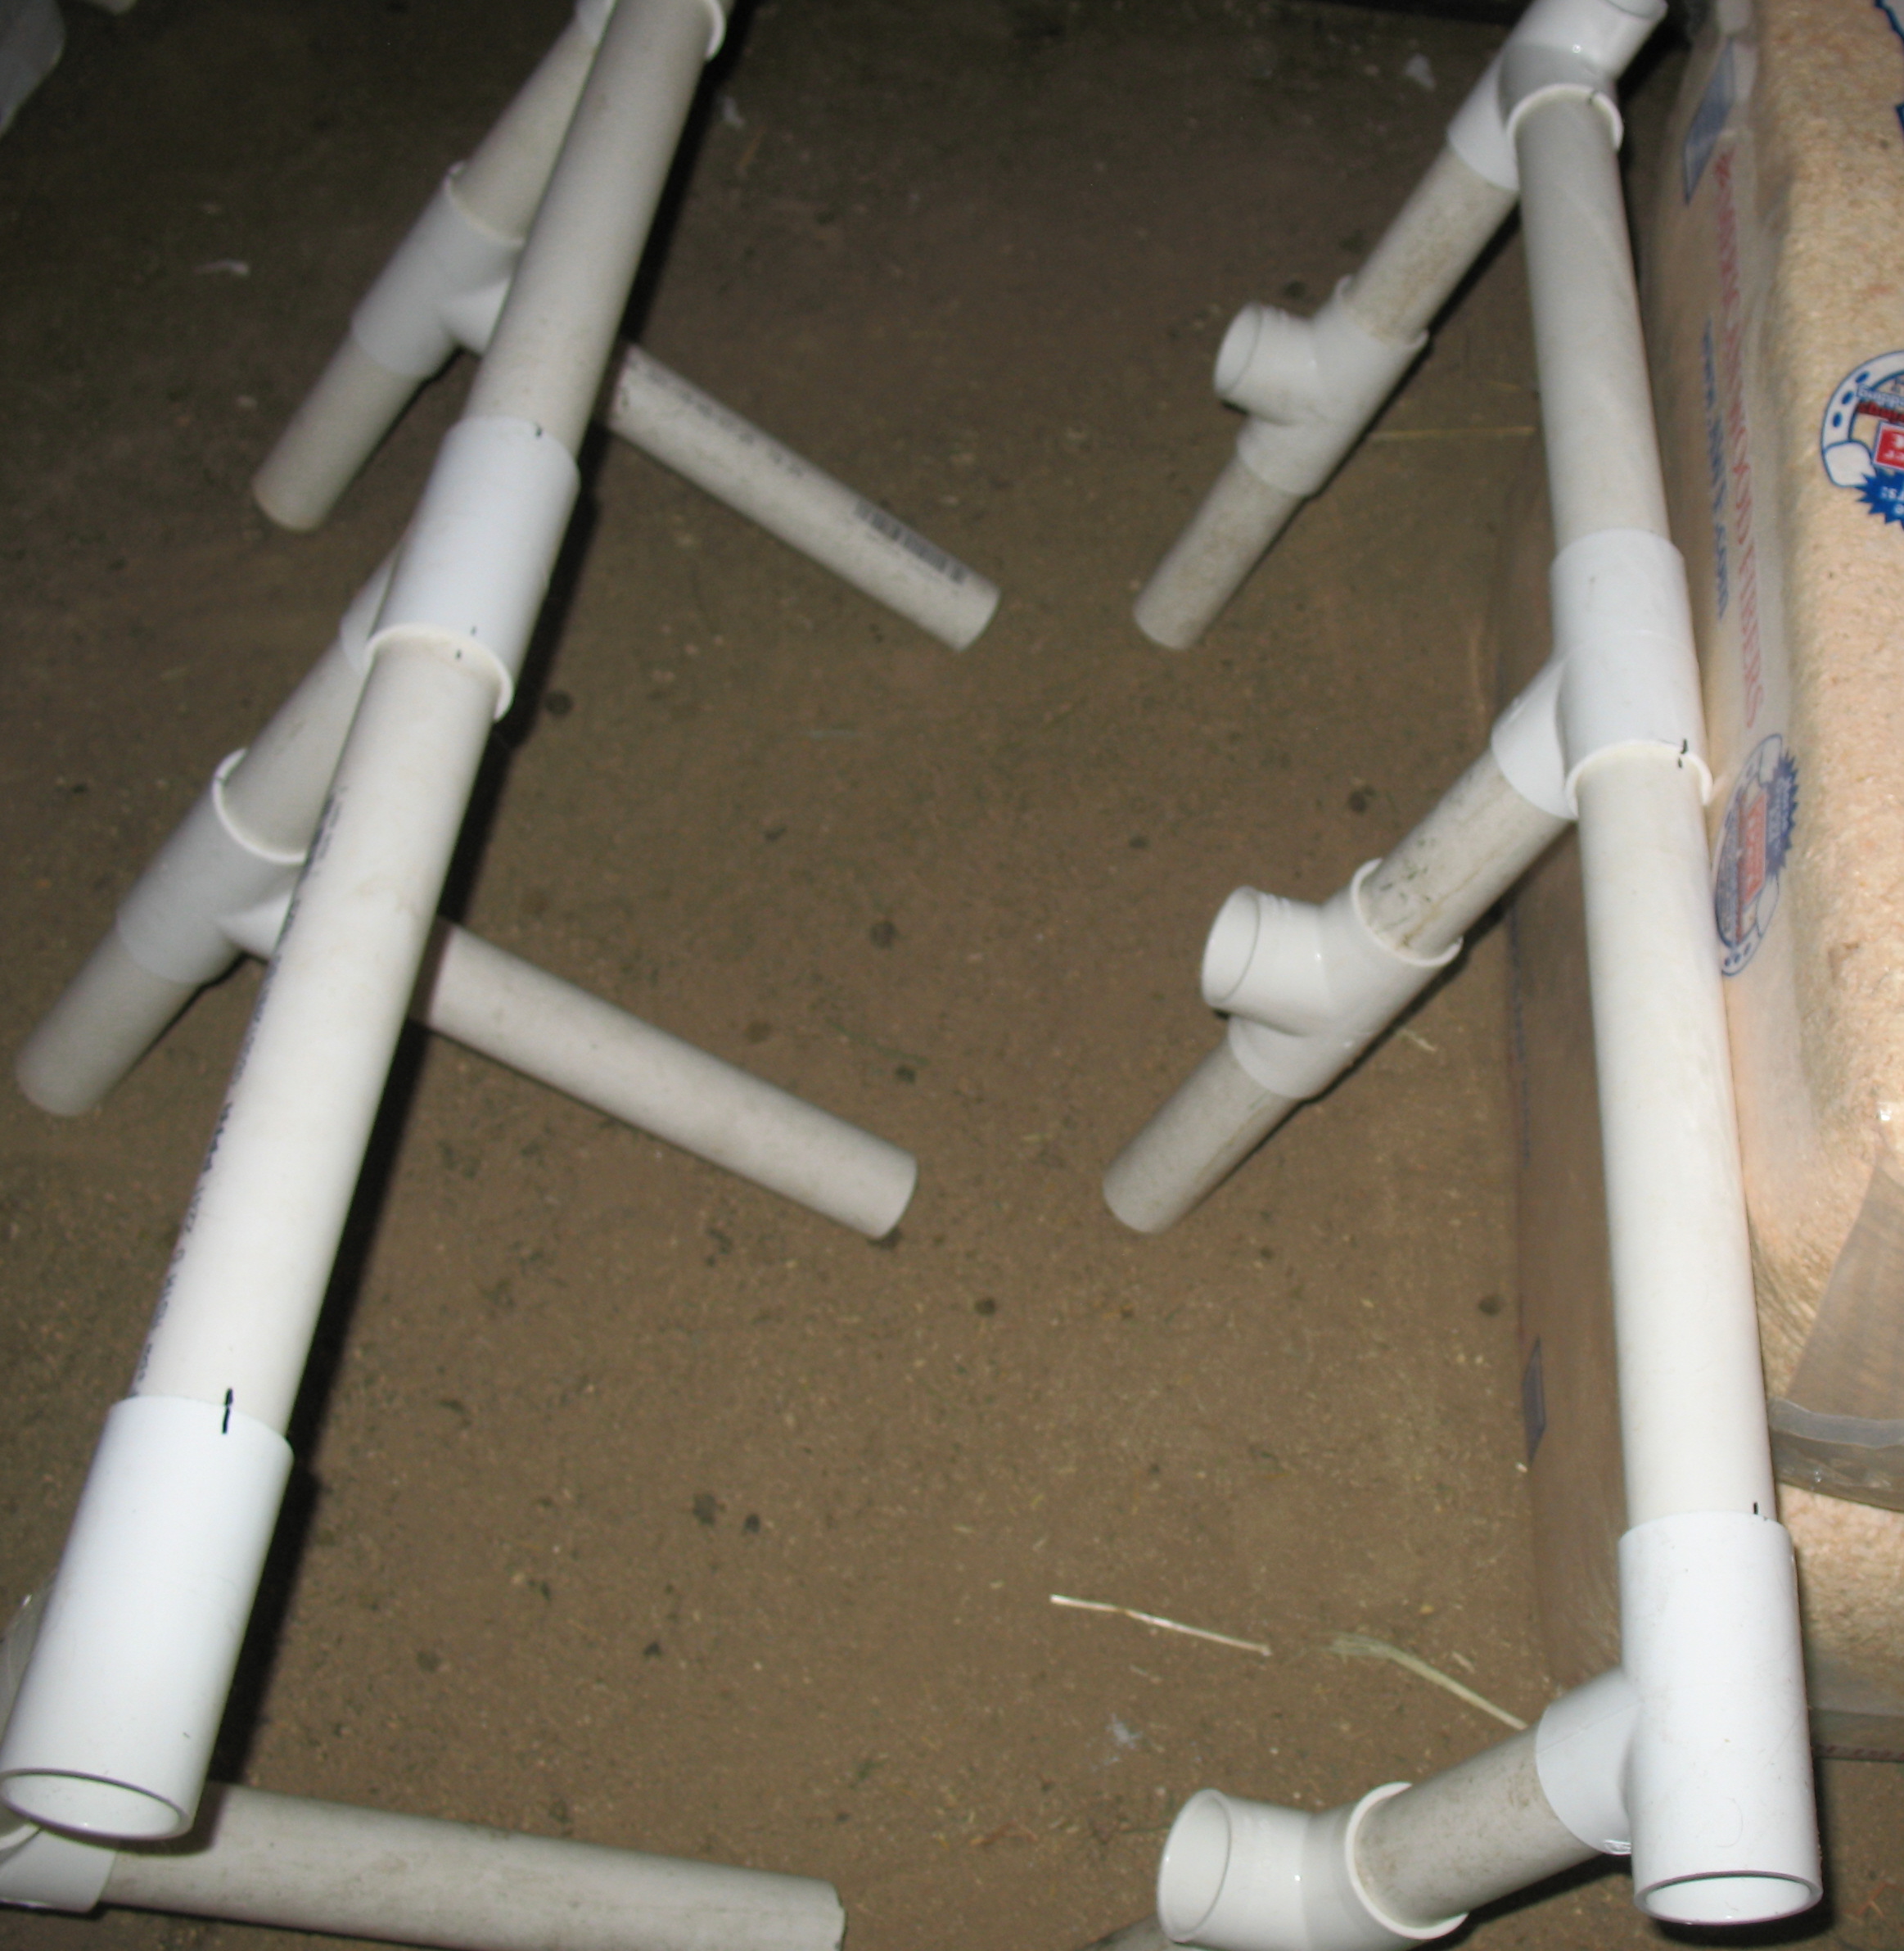
| 4. Assemble sides using 3 T’s for each, assemble legs using one T each, insert legs into sides, insert cross braces into one side and then connect all 3 cross braces to other side. (See photo below) |
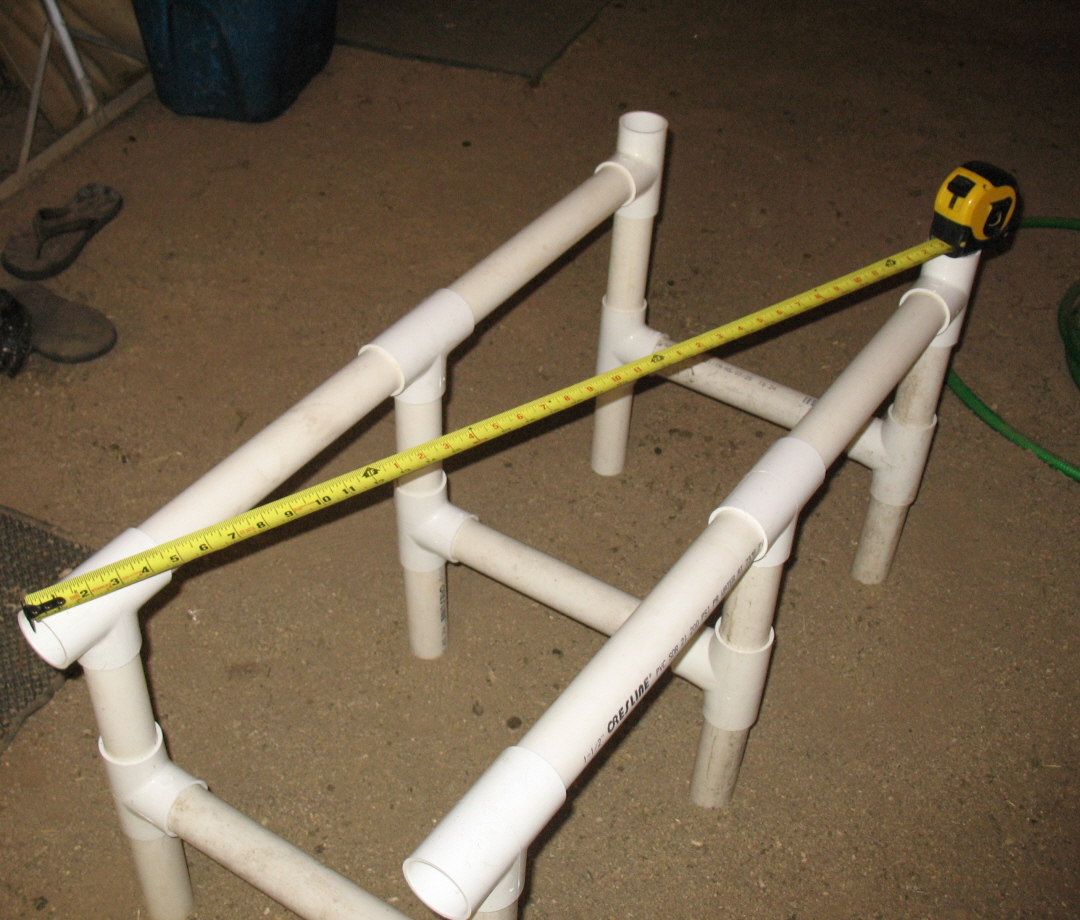
| 5. Check all joints for alignment. Check platform for square by measuring diagonal from each corner, measurements should be equal. (See photo below) |
| 6. Mark each joint for correct alignment when gluing. (See photo below) |
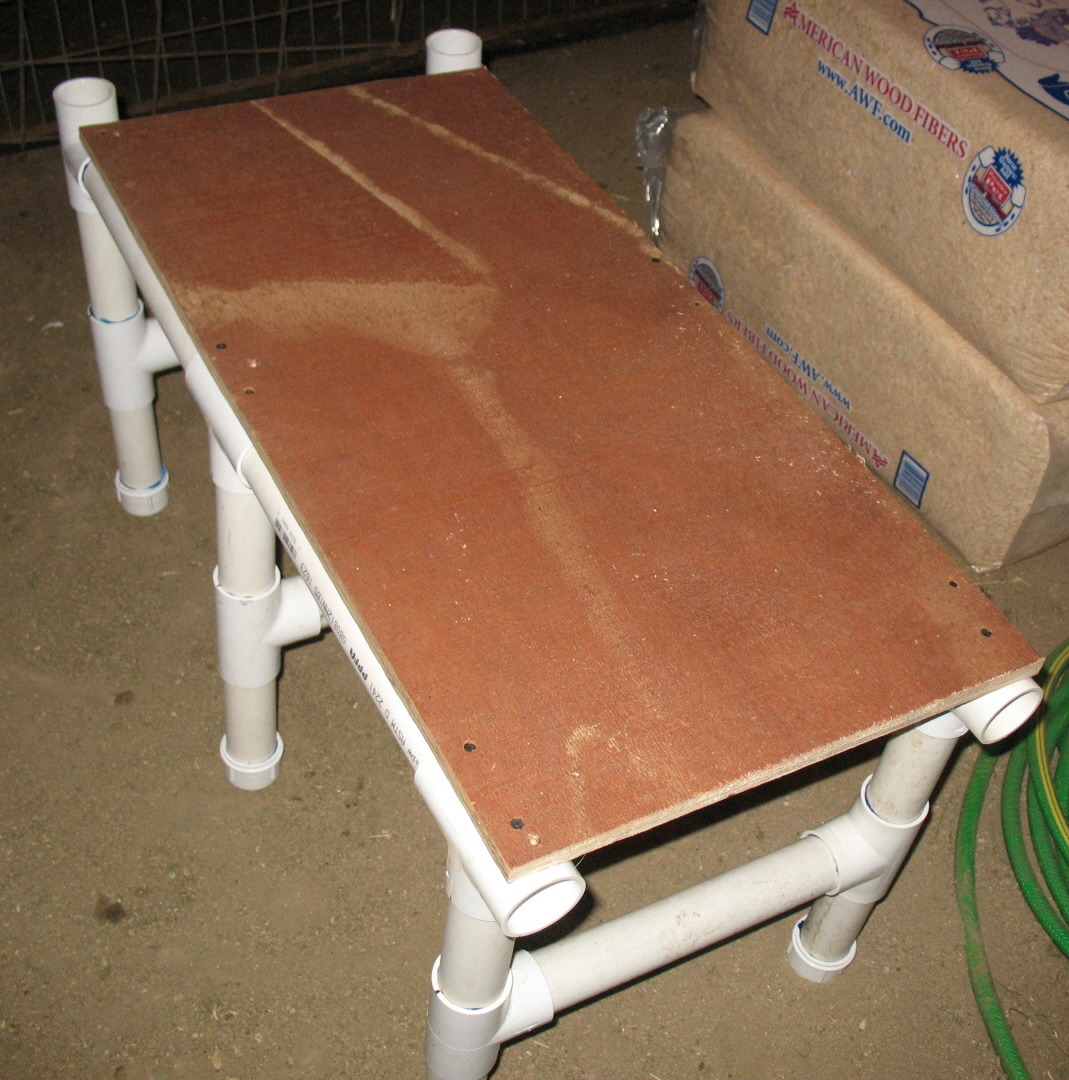
| 7. Glue platform supports then legs for each side. Glue cross braces to one side and then glue all three cross brace connections to the other side. Hopefully it will be straight and level! (Remember, the glue will set almost immediately, so you must work quickly and accurately!) |
| 8. Cut Plywood to 34×16 (double check size on your platform!) Place on platform supports and anchor with deck screws at each T connection. (See photo below) |
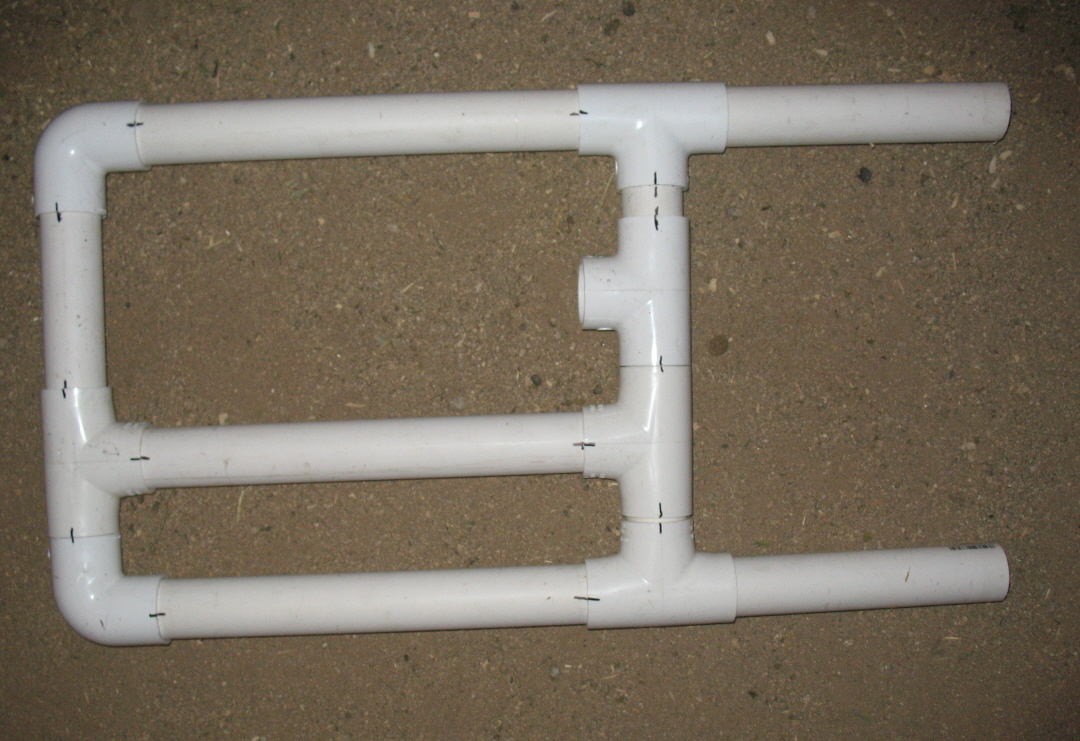
| 9. Headgate: Cut 2 pieces at 10″ each (for lower part of headgate) |
| 10. Headgate: Cut 3 pieces at 15.5″ (for verticals upper part of headgate) |
| 11. Headgate: Cut 1 piece at 7 1/4 ” and 1 piece at 2″ (for horizontal top support) |
| 12. Headgate: Cut 1 piece at 3″ and 2 pieces at 2″ (for horizontal/ feed pan support) |
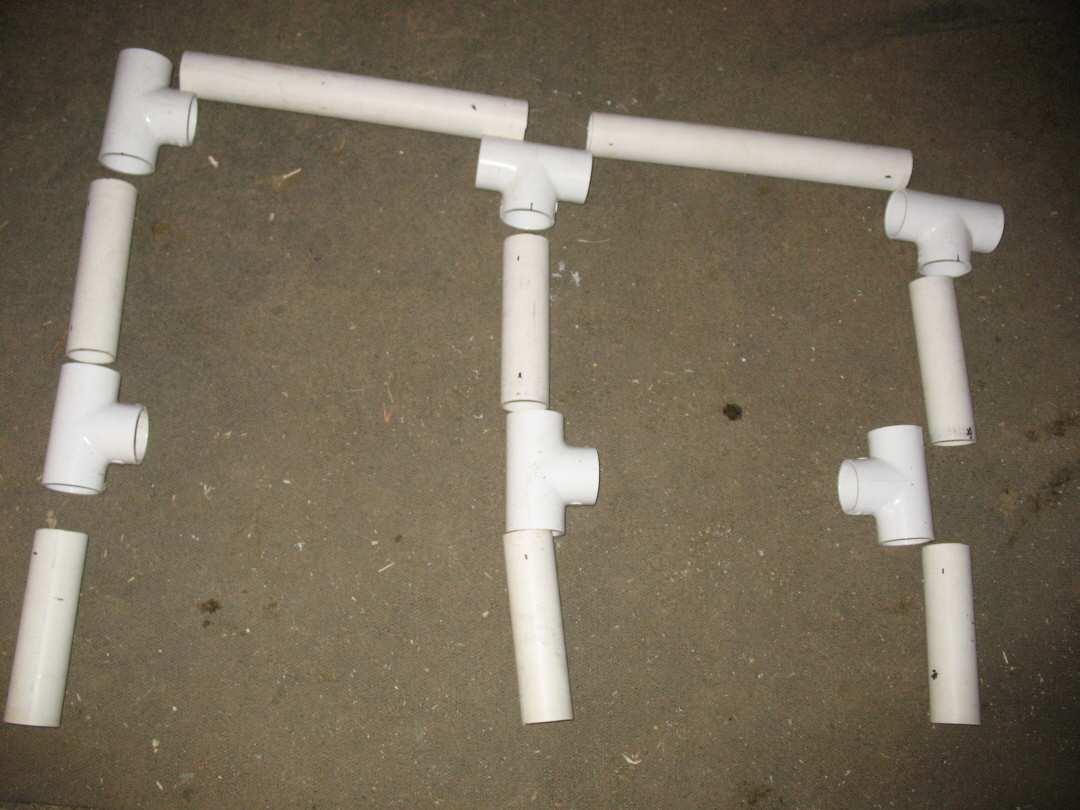
| 13. Using 3- T’s and 2 -90’s dry assemble headgate as shown below. (See photo below) |
| 14. Mark all joints for correct alignment when gluing. |
| 15. Glue horizontal sections first, then glue bottom verticals to feed pan horizontal, then glue 3 long verticals to feed pan horizantal, then glue top horizontal to verticals. |
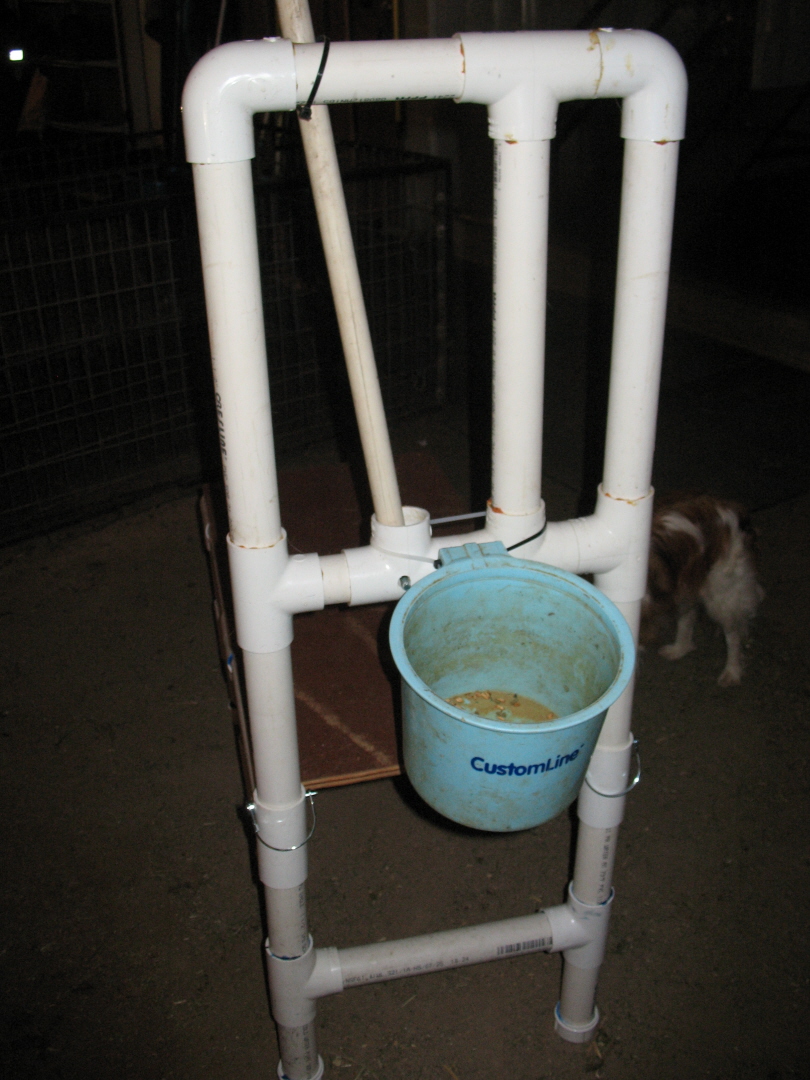
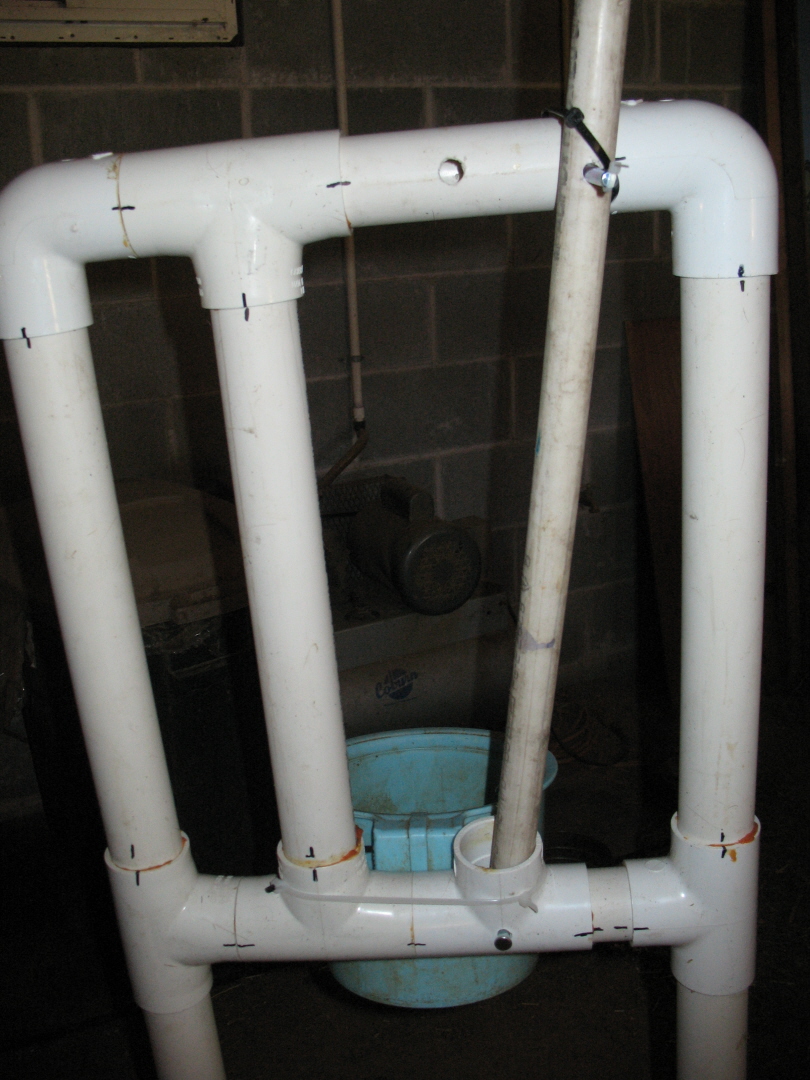
| 16. Insert headgate into base and drill holes through base and headgate verticals for clevis pins (this makes the headgate removable for travel), or glue for permanent attachment. (See photo below) |
| 17. Cut 1″ PVC to desired length for locking bar. Insert into T in feed pan support and drill hole for pin attachment. Drill two holes in top support for open and closed latching with pin. Note our “fancy” use of cable ties to hold locking bar close to headgate!) |
| 18. Hang feedpan from front (again here we used zip ties!) |
| 19. You’re done! |
 |
 |
 |
 |
 |
|
| Cut | Dry assemble | Check for square | Mark joints | Dissasemble | |
 |
 |
 |
 |
 |
|
| Glue platform and legs | Add plywood to platform | Dry assemble, mark, and glue headgate | Front of headgate | Back of headgate | Finished! |
